The Polytunnel Build
The Polytunnel project was one we needed to produce our summer crops such as Peppers, Aubergines, Tomatoes, Cucumbers, etc. And with so much to grow, we decided to go for a good-sized polytunnel so we had plenty of scope to expand when we wanted to - Always get a couple of sizes bigger so you don't outgrow it.
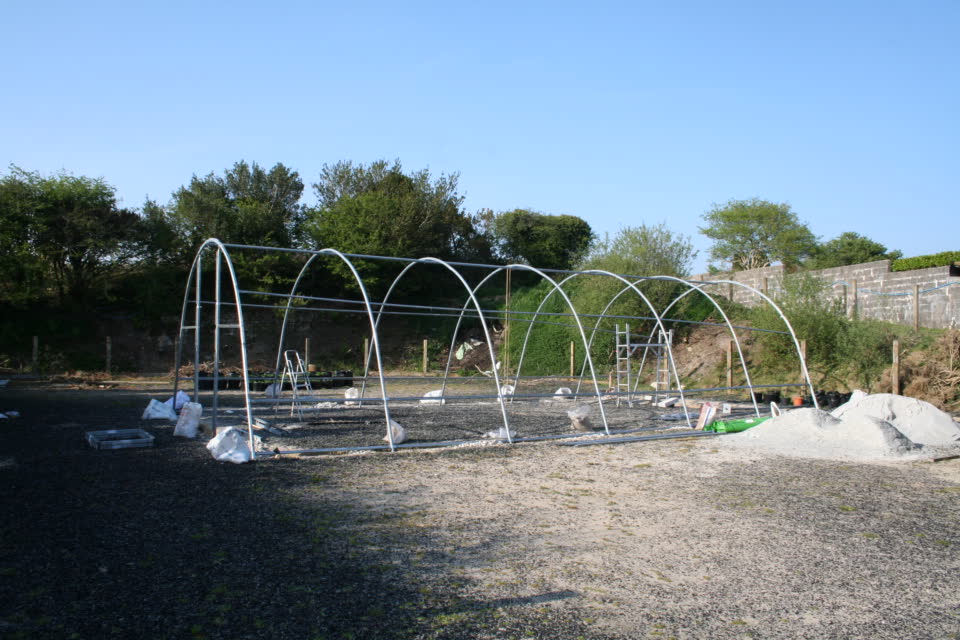
So in the end we went for a 40 feet x 20 feet x 10 feet tunnel made from really good quality materials and a decent strong tube. We bought a kit to make things easy and this came with instructions and diagrams to help with the build, which I may add, was invaluable when doing the build.
After checking that all of the parts were present the first task was to outline where the polytunnel was going to be placed on the sand ring. We had to dig out 14 holes, 20 inches deep to hold the frame plates in situ, and then to fill in behind them with the large granite chippings. The plates needed to be bolted onto the bottom tubes so it was all connected.
The Polytunnel project was one we needed to produce our summer crops such as Peppers, Aubergines, Tomatoes, Cucumbers, etc. And with so much to grow, we decided to go for a good-sized polytunnel so we had plenty of scope to expand when we wanted to - Always get a couple of sizes bigger so you don't outgrow it.
So in the end we went for a 40 feet x 20 feet x 10 feet tunnel made from really good quality materials and a decent strong tube. We bought a kit to make things easy and this came with instructions and diagrams to help with the build, which I may add, was invaluable when doing the build.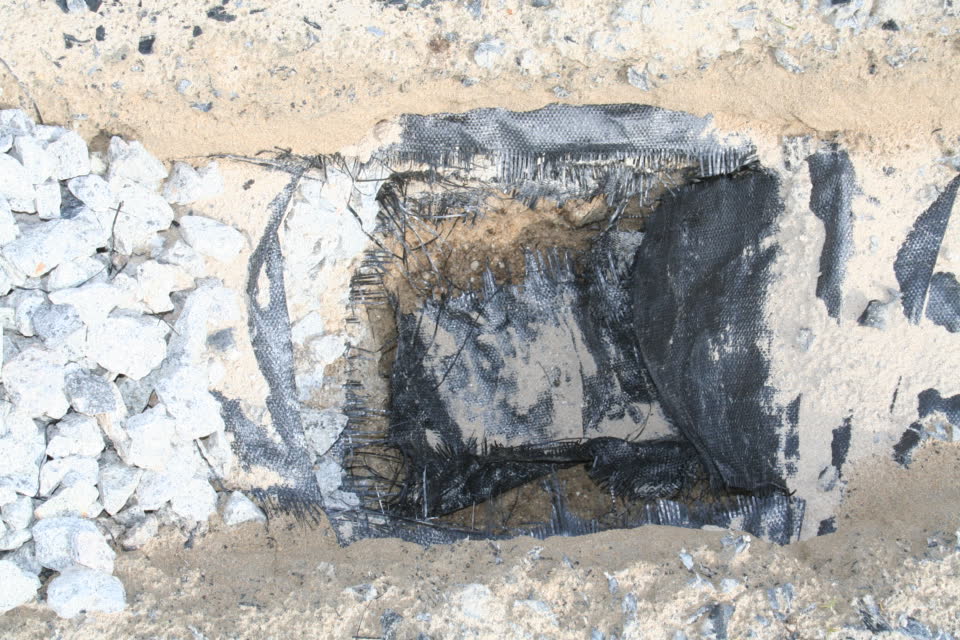
After checking that all of the parts were present the first task was to outline where the polytunnel was going to be placed on the sand ring. We had to dig out 14 holes, 20 inches deep to hold the frame plates in situ, and then to fill in behind them with the large granite chippings. The plates needed to be bolted onto the bottom tubes so it was all connected.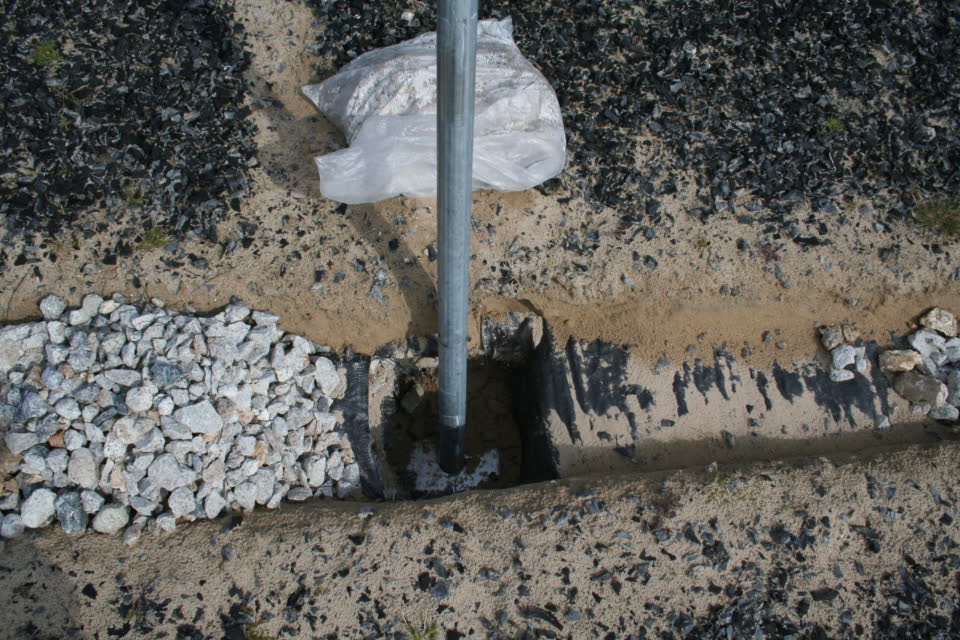
You can see in this photo that there are different layers on the sand ring. The bottom layer is a mix of silver sand and stones. The next layer has just silver sand, and then a layer of large granite stones, followed by the top layer of sand topped with rubber chippings, all separated by weed suppressant fabric. All of the holes had to be level with each other otherwise the tunnel would have a slope to it - not good!
The holes could not be filled in until all of the frames were straight and level all of the ways around which took a little jigging about. We started with the first arch and then moved on to arch 2, then the first top bar was fixed to hold them together. With seven arches to line up it took some doing we can tell you, but eventually, we got there. All of the arches and tubes are connected by heavy-duty bolts and washers which when tightened up make for a really strong frame, especially with 50mm tubes.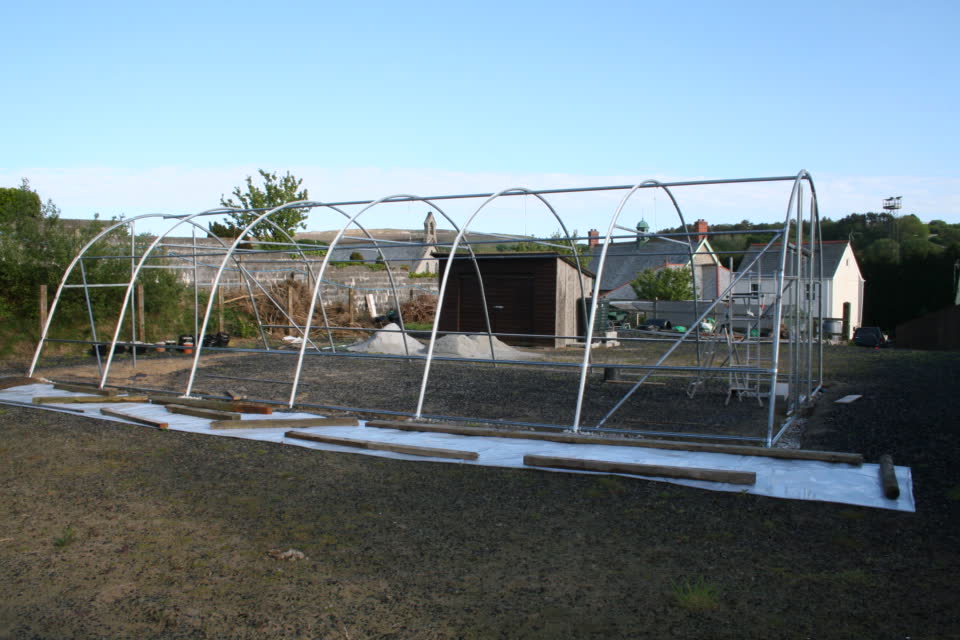
After completing the mainframe, we added the sidebars, bottom bars, and storm bars to channel kinetic energy from the winds down into the ground. Next came the crossbars and the end frames with the door sliders, and all of the parts were made from very strong galvanized tubing, connected with galvanized bolts and washers. From the next photo, the frame is now ready for its covering, which has been UV treated to last longer, and this is laid down ready to pull over the frame. We were not sure if we could do this ourselves, but after tieing a stone in each corner and using ropes we just pulled it straight over the top (best done on a VERY calm day) and down the other side without much effort. After weighing it down with bags of cement, Paul started to fix the sheet to the frame using zig-zag wires which slotted into the special bars which are the two lower ones on either side of the frame, on the end frames around the arch, and around the doors and end frames.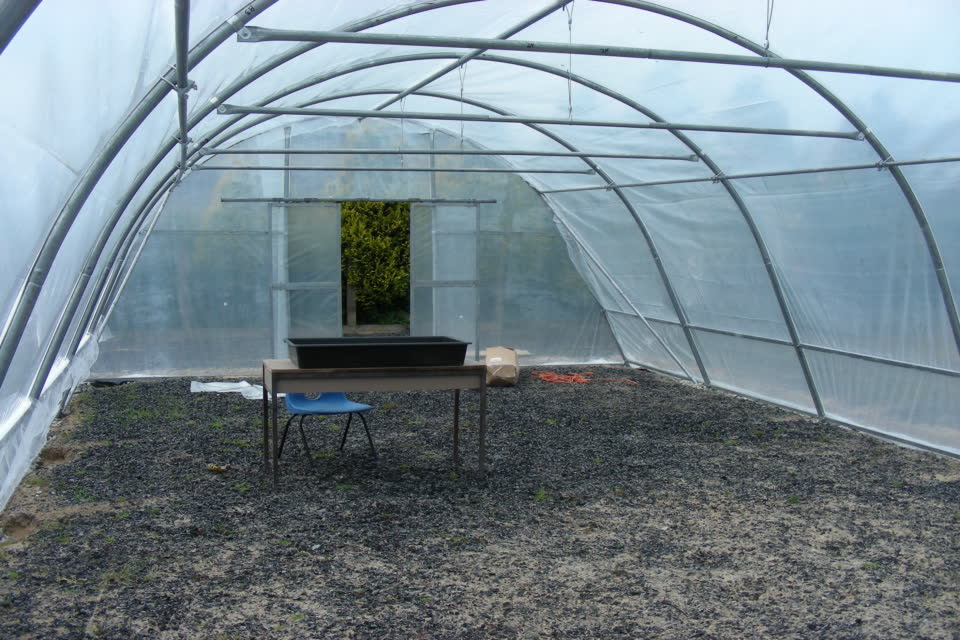
After fixing the cover and getting it secured and fixed, the ends were then covered and fixed with the zig-zags, the doors were hung on the door runners which work really well. The excess plastic was trimmed all around the frame where required, the trench filled in with the sand to further strengthen the frame and it hardly moves at all although it does creak when the wind is fairly strong.
Overall, the build went very well once the parts were identified and Paul labeled them all using a felt tip pen so they would not get mixed up once unpacked. The different shapes do speak for themselves but identifying each piece made things easier to choose the right parts at the time.
This kit also came with a winding mechanism so the lower side could be wound up to allow air circulation into the polytunnel which helps deter mildews, etc.
The major downside we had to place the tunnel on the sand ring is that the inside has the same levels of materials so that we could not plant straight into the ground which is why we are using containers to grow produce for the first few years whilst we dig up the materials to use elsewhere on the property.
This will take some time as the are tons of sand, stones, and ballast to remove, and at present, we have taken away nearly two arches worth from the polytunnel to use in making cement, concrete, and also on the roads and ramps to strengthen them when wet instead of having muddy ground. When we are further ahead we shall barrow in compost to fill the hole and then we can grow directly into the ground. We certainly look forward to that day.