Loraines Workshop - The Germination room

This is the room where all of the magic starts! It is here, in Loraine's inner sanctum where the seedlings are germinated, pricked out and re-potted, and prepared for their life outdoors, or even in the polytunnel. It is a long process and as you build up experience, you get better at the finer points of seed production and your successes continue to grow. We save much of our own seed and use it the following year, but we do have to buy certain seeds and also like to try out others that we have not used before. When buying seed, it's best to think in 3D, and by that, we mean before choosing your seed, you need to answer certain questions such as where will it be grown, outside or inside, grown in direct winds or sheltered, will it be warm enough, or even too hot! Add to that allowing for the weather conditions and that my friends, is the golden question! The same seed will fare differently due to the weather, i.e., hot enough, too cold, too wet, too windy, too exposed, too dry, and so on. So at the end of the day, it is pot-luck that the seed you choose is the right one for that year's weather.
But that said, don't let it worry you, even the experts can get it wrong, that's gardening for you. The seeds are planted according to their needs, and as they germinate and grow, they will have to be pricked out, in other words, separated into single plants and re-potted, but not necessarily in single pots. Many seedlings can be planted say, four to a pot, or even in seedling trays as 'plugs', little individual plants.
The next stage from there is to 'harden them off', and you do that by putting them outside in daylight hours, but bringing them in at nights when it gets cold and a possible chance of frost which would kill any little seedling stone dead. Once hardened off, they can then be left outside until required for planting in their chosen spot for that year. 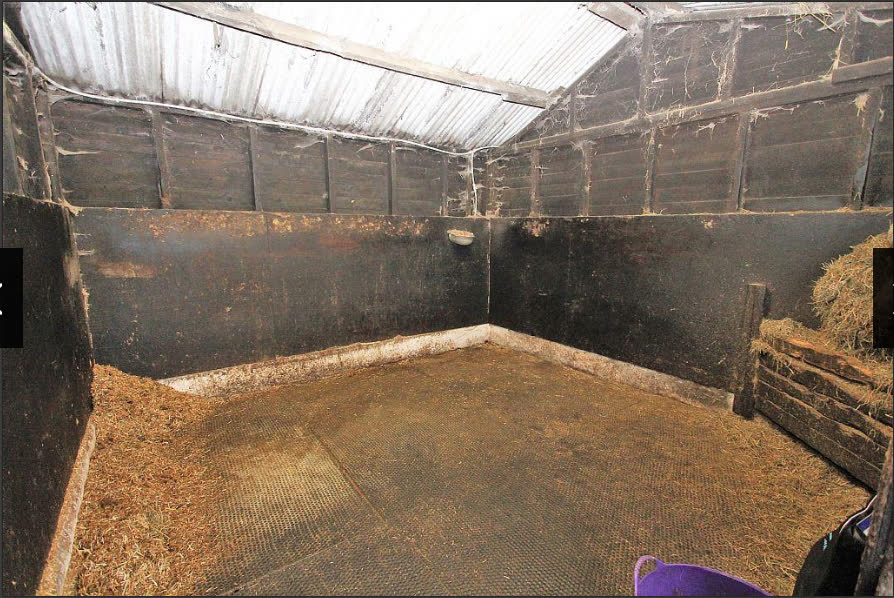
This photo above shows the starting point for building Loraine's workshop, not too nice huh? After taking down the fittings, cleaning all the hay out, then lifting the heavy rubber mats, we could then clean down the floor and let it dry out. The rubber mats we cleaned out on the patio and moved them back into the room when they had dried. From there it was a case of boarding out the rest of the exposed walls and then painting the lot with white paint to make it bright. It was at that point we realised that the roof had to be done as there were too many small leaks that would have kept the workshops damp, but that is another project.
The roof after it was done.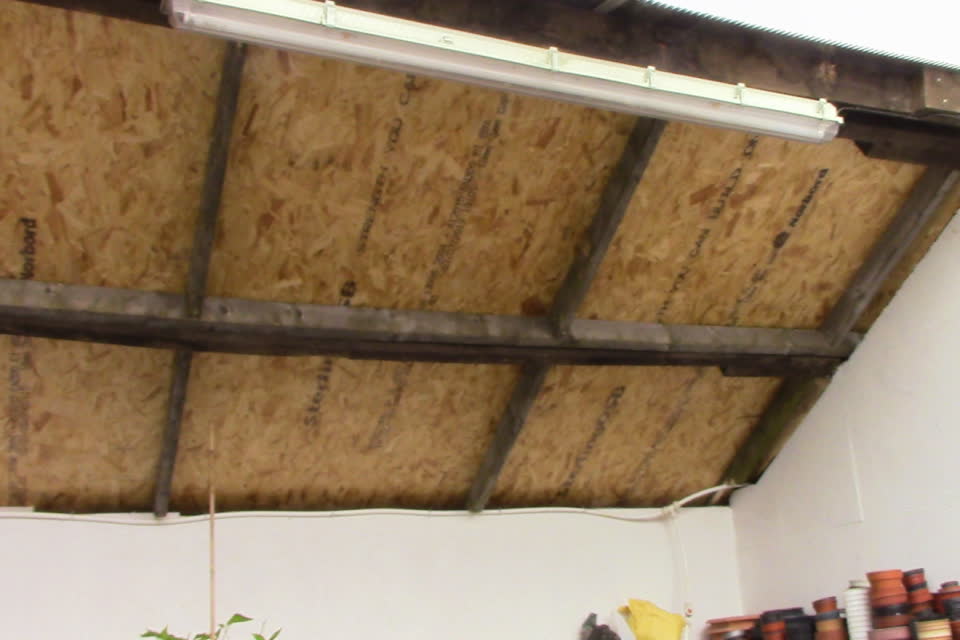
The roof above looks much better than the original one, don't you think? After doing those tasks, it was then time to build the bench to work from and hold much of the items required for gardening, and for this, Paul utilised the 4x2 timbers taken down from the sand ring area which was superfluous to our needs there. It was just a case of building a frame and then topping it with boards to form the bench. Shelving was put up to house the numerous plant pots we had amassed and tool racks/holders to keep things neat and tidy and also allow us to find what we needed.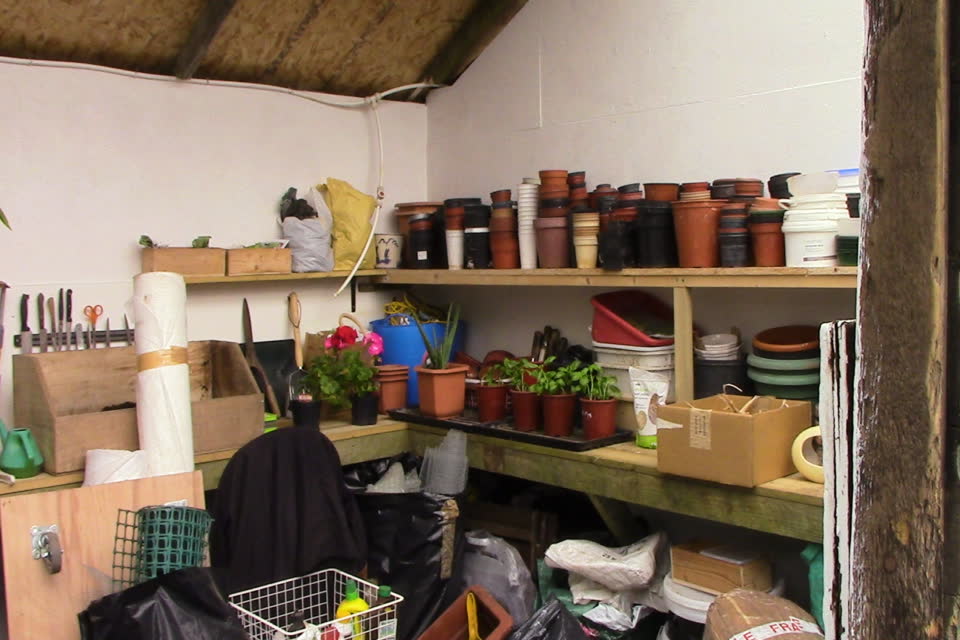
It was certainly a bit of a squeeze at first as we had all of our gardening equipment in this small space as at that time we had nowhere else to put things, that included all of the nets, weed suppressant material, bags, pots, Etc, Etc. However, it was a start and at least the items were in a dry and light space. By this time, the light was very bright as Paul had finished the roof and on the south side of the room, we had triple-wall plastic sheeting to allow as much light in as possible to help the seedlings grow. This sheeting was also placed on the front wall of the room to give a light and airy effect.
We think it gives a good light feel to the patio and the growing room and also makes it look big and bright This view from the patio shows the growing workshop on the left with its see-through door to add to the looks. The door on the right is for the outer building workshop which you can read about on 'Paul's Workshop page' on the link below. It was certainly worth the effort as we now have a great area to bring on the seedlings and even in the winter months, it gets nice and toasty in there when there is a little sunlight. The rubber mats are nearly an inch think and also keep your toes warmer than standing on a concrete floor, so that's a bonus.